
Connecting To WiFi
When you first open Arduino IDE, things are pretty stark but give us a little scaffolding to build a new project.
| |
The compiler needs to know two things:
- Where to look to find WiFi code, and
- What to use to connect to an access point.
#include statements tell the compiler to look through its notes to see where it put code
for something. Header files keep those notes, and serve as a reference for the full code
that needs to be stuffed in the compiled binary.
#define macros are hard-coded variables that the compiler uses to copy and paste into the
final code before it’s compiled. They’re not always the best approach, but appear often in
embedded code like ours and serve well for a prototype since they stand out clearly.
Let’s add an #include reference for WiFi and #define statements for connecting it.
| |
The setup() method in the sketch tells the board what to do when it first starts. There’s
two things we need it to do:
- Connect to WiFi, and
- Tell us that it’s doing something so we know what’s going on.
Connecting is easy: that’s one line. Talking about it gets chatty, though.
To keep setup() short and neat, we’re going to move a lot of that to a new method called connect().
This will be useful later on when it needs to run unattended and reconnect on its own.
Note that connect() is placed above setup(): the compiler reads through code like we read
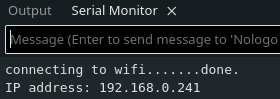
a book, and needs to know about it before it reaches the next chapter. It’s just going to print
a bunch of dots while it’s waiting for a connection, and then tell us the IP address it gets
from the access point.
Debug statements over USB are handled by Serial. It needs a fraction of a second to make
sure it sets up properly, so we’ll add a small delay, too. print tells it out type out something
and println tells it to hit enter when done.
| |
Our code isn’t elegant, but we’re throwing together a prototype to get it out quickly.
With the board plugged in to USB, go ahead and upload it.
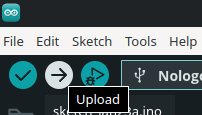
Compiling will take a minute, but fortunately most of the code is already written for us. When it’s through uploading, open the serial plotter (magnifying glass, top right). You should see it pumping out dots until it connects to WiFi.
That is good enough for now.
Next Up: Getting The Time