
Power Jumpers
If USB is plugged in at the moment, you’ll want to pull the cable to avoid shorting anything out.
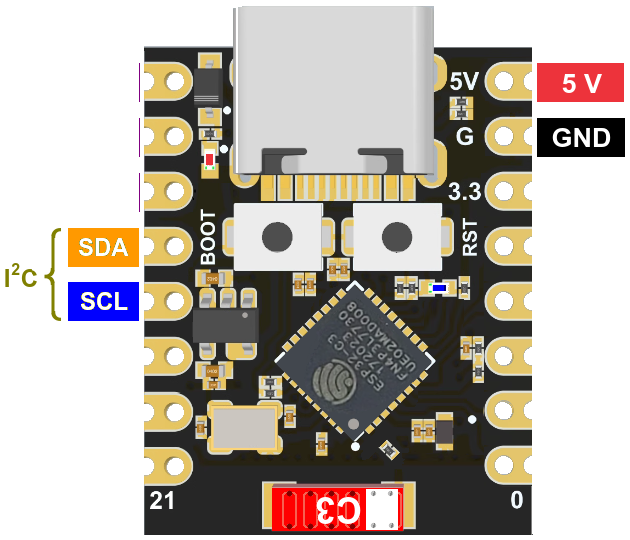
There are quite a number of pins on the ESP32 board, but only a few are important for our purposes. The 5V and ground pins are on the right at the top:
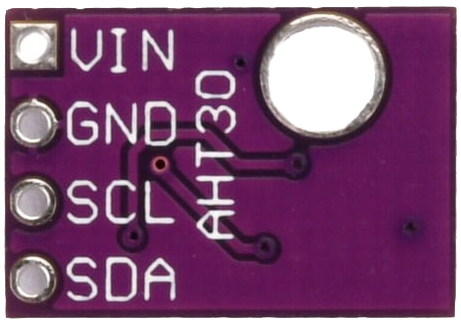
On the AHT30 board, they are under mounting hole on the board.
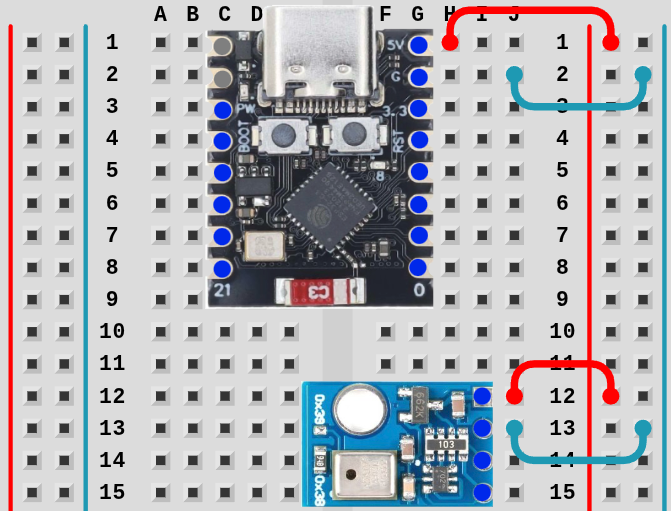
This time, we’re going to make use of the power rail so the battery pack can be used later.
Power pins are all hooked together vertically, and it doesn’t matter where they are hooked up so long as positive is on the left and ground/negative is on the right side.
Breadboard manufacturers seem to favor teal blue for GND, but it’s standard black for DC power in most connections and the kit wires honor that.
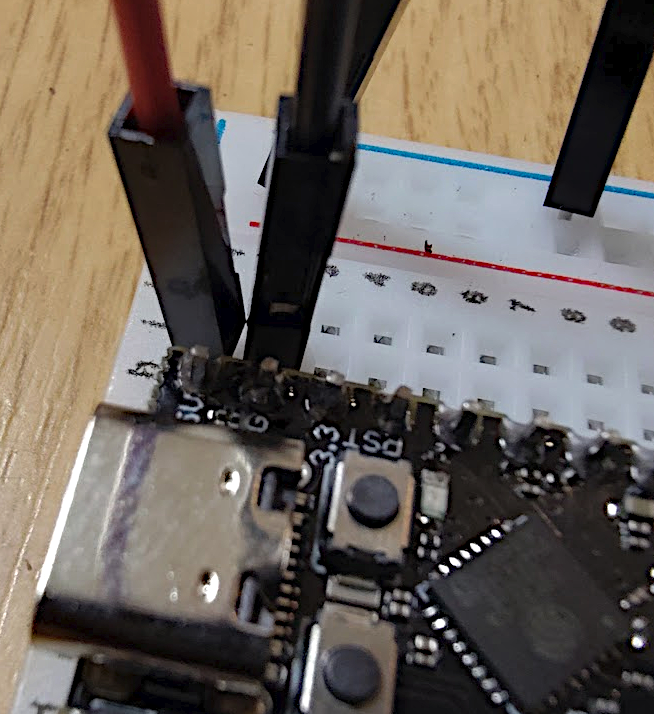
TipIt’s easier to start with GND since the pins are not near the edge.
TipCounting pin holes is difficult to see without help for most people. If you lightly place the pin in the first hole at the top of the ESP32, you can gently pull the pin down the board, feeling for the ridge bump before placing it in the hole.
For the AHT30, place the pin over the top connection and lightly drag it down one hole as well.
It’s very easy to accidentally place the GND pin in the wrong place for the ESP32 and not allow the board to be properly grounded. You may want to use your phone camera to zoom in and verify.
If improperly grounded, you might get a light 5 Volt shock when touching the metal USB socket while plugging/unplugging the board. The sensation is less than the static shock of pulling towels out of the dryer, but it can cause a little anxiety.
Next Up: Testing